9. Mains Variac and Regulator Repairs, Modifications and Teardowns
INSTRUMENT REPAIRS & MODIFICATIONS
# Action Status Problem Manufacturer Model Function/Features
1 Mod Done Add DMM & skt Claude lyons RK13 13A variac 0-275Vac
2a Repair Fixed Erratic Berco Regavolt 72C 10A variac 0-275Vac
2b Mod Done Add LED DMMs Berco Regavolt 72C 10A variac 0-275Vac
3 Improve Safer Lethal Nawzad N&H (Chinese) NHT-4000W Mains Variable Voltage Regulator
4 Improve Done Lethal/no knob Zenith Duratrak 100-L(-K?) 8A variac 0-230Vac
Foreword: Variacs
https://sound-au.com/articles/variac.htm
A known failure mode of older instruments with SMPSU supplies is exposure to elevated mains voltages.
I had not considered this affected me until the appearance of mains monitors in the UK Government drive to reduce power consumption. I was already aware of my consumption but bought one out of curiosity and was surprised to find the voltage hovering close to 250Vac, well above the nominal 230Vac although I believe it used to be 240Vac, but was lowered after collusion with Europe. I'm sure in the past I measured it much closer to nominal and it has risen over time, doubtless to compensate for the significant increase in housing estates that have come to dominate what used to be the small country town where I live. A relatively new substation built nearby probably had something to do with it. The UK electricity supply tolerance is -6% to +10% which allows up to 253Vac as 'normal', so there was no opportunity to lodge a complaint and even if there was, nothing would change.
It often takes an event to elicit change and the spectacularly smelly failure of the mains IEC filter in an HP4952 Protocol Analyser, see [General Repairs] was my catalyst to prevent the failure of more critical instruments.
At first I selected and bought a dedicated ac mains stabiliser that switched in different transformer taps under µP control, but I found it dissipated a good 30 watts by itself even when the equipment was switched off, and got annoyingly hot. I came in the morning after I installed it and found its fan screaming away accompanied by a nasty smell I later realised was overheating transformer varnish that took 3 days to vent out of the lab. Inspection of the design revealed it appeared to be switching in primary taps as loads, I assume to save the expense of the extra copper that would be needed for secondary taps. I found a buyer who fortuitously needed to increase their voltage and thought again.
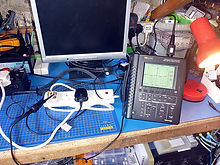
I ran a 12 hour mains measurement with the Tek THS720P and found the mains voltage did dip, but overall it was consistently high. It occurred to me a much simpler solution with minimal dissipation would be to simply buy a variac, reduce the output volts, and power the lab off that.
I trust the longevity of vintage UK-built Claude Lyons variacs far greater than the many new cheap red Chinese/Eastern European ones flooding eBay in the 2020s. Berco is an historical Claude Lyons product, and they also acquired Zenith in the 90s. Claude Lyons/Berco variac models over time:
[W1] Claude Lyons (also Berco) variac model history.pdf
The Regavolt series brochure below gives example wiring diagrams:
1. Claude Lyons RK13 13A Variac
My first variac which I got at the bargain price of £42 including postage.
a) Add UK Mains socket & neon
text.
b) Add output LED DMM
Having successfully added LED meters to the 10A variac I decided to add an orange output LED meter to the 13A variac as well.
c) Brush replacement (when the time comes)
https://www.eevblog.com/forum/reviews/variac-carbon-brush-material/
2a. Berco type 72C, 10A Regavolt variac
The lab already had a Claude Lyons type RK13, 13A Regulac variac running off a separate mains outlet but it was in regular use. I was very fortunate to win it on eBay UK for a mere £45 as they command a high price, and the new Berco type 72C, 10A Regavolt variac was double that price, but it had a housing that was perfect for a couple of $4 eBay China mains voltage & current LED meters that I fitted next, although how long these will last remains to be seen. Their fitment is described below the next section.
Below, THS720P 249.5Vac avg over 12 hours Below and right, the 10A Variac on arrival, and its ratings

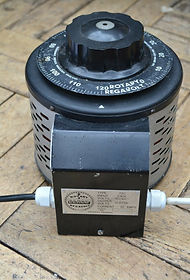
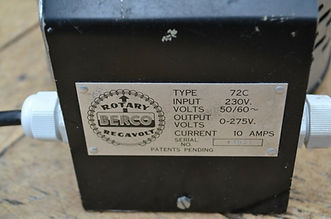
10A VARIAC REPAIR
Whilst testing the LED meters I noticed the new variac that had worked well up until then, turned off its output completely over a short range centred around ~75% rotation, a position I had not used it in up until now. This resulted in its teardown and the repair of a previous owner's bodge:


The hex socket screw in the top of the knob (uppermost middle photo) tightens a collet within, that secures it to the 1/2" rod upon which the variac rotor turns.
Above, left to right, 1-4:
Once this screw is removed, (1) the Knob together with its dial can be removed. (2) The knob is secured to the dial by 3 countersunk screws on the underside of the dial which has a reverse direction scale and 3 long screws retained by nuts. These screws lodge in 3 dimples on the top of a round wooden spacer (3). (4) is a better view of the underside alternative reverse scale with these screws removed.
Below, left to right, 1-4:
(1) The wooden spacer is attached to the rotor below, by 2 screws tapped into it and secured into the wood with yellow wax. Between the spacer and the rotor is a square cardboard washer, the purpose of which I assume was to add a little more height to the wooden spacer that wasn't quite tall enough.
(2) I tried adding a spring on a washer to add a bit more tension to the bodge, but the voltage still cut out about halfway around its dial.
I then tried to figure out why the bodge was necessary. Side view (3) reveals the rotor arm pinch bolt is missing. At first I assumed it had broken off, but closer inspection revealed its thread extended fully across the rotor pinch assembly and it readily took an M6 bolt. But this was with the wooden spacer above it removed and this is important, because from the very last photo at the bottom of this repair section, it is evident that one of the wooden spacer screw mounting holes is tapped into the rotor and into the end of its M6 clamp bolt thread, rendering it useless. Perhaps they didn't realise this before they drilled the hole, and bodged their own bodge?
There is another missing part: the existing 13A lab variac (4) has a bracket screwed into its the rotor side that attaches an integral washer below it, but this is missing from the bodged variac (3).
I wondered if the wooden spacer had been added to force more pressure onto the rotor to counter this missing bracket washer, but once I had added the M6 bolt it seemed to work without issue.
The rotor is the return path to the variac terminals, and this bracketed washer makes the circuit to the metalwork below the rotor that connects to the wiper terminal.
Another puzzling detail is why both rotors are painted black although the underside is free of paint, revealing they are made of conductive brass which again begs the question: why was the bracketed washer there? It also seems odd painting them black as they are hidden deep within the variac metal boxes.


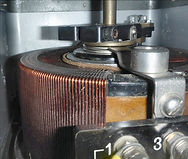
Below left, bodge disassembled.
There was another problem: the screw securing the phenolic insulating tube around the central metal rod was too short to engage the insulator and stop it moving independent of the rod. This is the same screw in the centre of the rotor side in photo 3 above, removed in the photo below left, that secures the missing bracketed washer visible on the 13A variac in photo 4 above.
Below right, top view is of the good 13A variac, bottom view is of the newly repaired 10A variac.


Above, you can never have too many metric hex screws, another eBay bargain.
Also visible in these photos, are the eBay China voltage & current LED meters I added, see description and more photos in next section.


This worked, even without the missing bracketed washer, but I was concerned it would not be reliable, otherwise the 13A lab variac would not have one, so I set about making my own from a piece of aluminium sheet, and fitted a longer screw through it to secure the insulator:

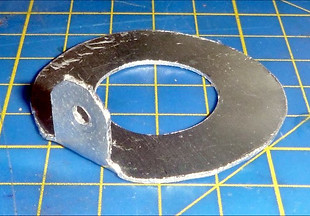


Top 3 photos: making and adding the bracketed washer.
Far left: bracketed washer dimensions.
Near left: a metal ring from a dismembered HDD into which I've drilled and tapped an M3 hex screw (fitted). To its upper right, a template to add 2 more screws.
Bottom left: the bodged variac's spacer lock screw on the rotor was functionless and a small metal ring at the base
crudely stopped the phenolic insulator falling out.
I replaced it with my HDD ring secured to the insulator to stop it moving, and sealed the 3 hex screws with RTV. The new M6 clamp screw secures the insulator to the rod.

Initially I felt some resentment I had paid a high price for a bodged and faulty piece of equipment, but I'm glad I was able to repair it. I wish I knew more about its history.
SO MANY QUESTIONS
I'm puzzled why the rotor clamp bolt isn't located near the end of the clamp. From the previous side views of both rotors, clearly this is because the rotor thickness sharply reduces immediately after the bolt and the clamp end is too thin to support an M6 bolt, but there are no smaller holes there either.
If the end of the clamp is unused, why is it there?
The sides of the rotor itself have a rough surface, almost as if it has been manually cut from metal and dressed with a rough file, unlike the smooth surfaces on the 13A lab variac. The clamp is also a different design.
It took some skill to tap holes into the rotor and melt yellow wax into a near perfectly cut round wooden spacer (what were the 2 holes in its side for?), and to machine the metal ring with the grub screw that was a perfect fit on the bottom of the shaft. All of this surely could not have been due to a missing M6 bolt and/or bracketed washer. Furthermore I can't think of a reason why this washer is missing if it's essential for reliable wiper connectivity.
It's also strange the rating label has been removed from the rotor arm (all that remains is 4 small mounting holes in each corner).
It has crossed my mind this might have been an early prototype. Perhaps discarded afterwards, the washer and label moved onto a sellable model and this one thrown in the bin, only for someone else to recover and reconstruct it for themselves using whatever was to hand?
2b. LED VOLTAGE & CURRENT METERS ADDED

Backtrack:
When the 10A variac arrived, the first thing I did was open it and discover it was wired with its output on the left and input on the right, which is counter to Industrial norms and confusing without a label. I immediately
swapped them, numbering them in the process.
I also terminated the bare wires in ring crimps, removing the possibility of wires working loose over time, far safer for high voltages and currents.
Left, I/P on right Right, I/P on left

To be able to fine tune the variac without exposure to high voltages, I bought a selection of coloured LED mains supply dual 50-500Vac / 0-100Aac meters from eBay China for ~$4 each.
I selected red for the input voltage and current, and green for the output.
Current is measured via small toroid transformers slipped over the wires.
Initially I fitted both but soon realised this was pointless and left just the output toroid in place, which also made the wiring less cramped.


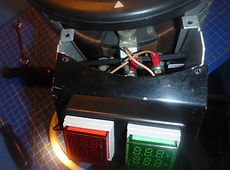
Although only 39mm deep, the meters were too long to fit in the cavity so I added the bottom section of a small ABS box as a spacer, screwing it to the metal top via its lid holes. The meters have 22mm round bodies. I used a 22mm hole saw to cut two holes equidistant on the variac metal shroud so they would appear side by side on the plastic box, then ran the hole saw 5mm guiding drill bit through the metal holes to create centering holes in the plastic box.
Below left to right: drilling the metalwork to take the LED meters.
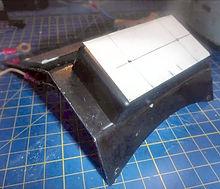


Bottom left: as hole saws have a rough edge, I then ran the hole saw through the outer surface of the plastic box via its pre-drilled 5mm holes. Next I dressed the rough holes with a metal file, screwed in the LED meters and sealed their nuts with RTV silicone rubber. I did the same for their wires, which I had pre-measured for the variac, and terminated in ring crimps:
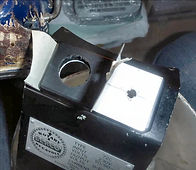


All that remained was to pop the plastic safety covers on the backs of the LED meters, wire them into the variac and click the transformer leads into their mating small black connectors.
One last touch was to pop off the input meter's clear plastic cover and add some black electrician's tape over its now redundant current display that was permanently showing 0.0 (amps), changing it to display IN instead. Finally I added three 0.5ND plastic filters to the insides of the coloured LED covers which were otherwise far too bright; the filters also hide the black tape from view.
Over the course of a few days I fine-tuned the variac output and eventually settled on a compromise of ~10Vac less than the incoming mains: based on observation and being not far from a substation, it seems highly unlikely my mains will fall to 220Vac,
I checked the LED meters against the HP3468A DMM and found them to be pretty accurate at around ±3Vac. The current is less accurate, but not too far out although between the four meters I bought, current accuracy varies more than voltage. Mains current is only a concern for me if it rises near the the 10A carry ability of the variac, but that is highly unlikely to occur. Nonetheless it's beneficial to have the current displayed should I ever approach 2kW of mains power in the lab, in which case I'll offload some of it to the other, 13A variac instead.



3. Nawzad N&H NHT-4000W Chinese 'thyristor electric voltage regulator AC0-220V' 5
Problem: lethal design
The price of variacs see [Variac Repair & Add Meters] has risen considerably over the years, regardless of being old, original workhouse British types or new Chinese variants now with high shipping (2024).
In 2023 I noticed eBay China selling semiconductor based mains regulators for £16 and bought one. Having already observed underhand practices with the Chinese 75W 12Vdc to 110Vac 60Hz inverter I bought in the past see [Projects: 20Vac 60Hz PSU], I did expect some issues, but nothing like the many I discovered.
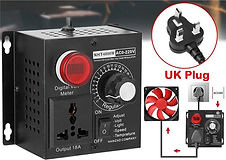
Original auction/ad:
220V 4000W Variable Voltage Regulator Speed Motor Fan Control Controller UK Plug
The inductive load is 1/3 of the resistive load.
'Do not use with air pump, electric/electromagnetic machinery or LED lamps as these will be damaged.
This product is a metal case and must be grounded safely'
Ad specification:
Input Voltage: ac220V
Output Voltage: 0~220V (Adjustable)
Adjustable Range: 0~220V
Max Power: 4000W (resistive load)
Rated Current: 9A
Max. Current: 18A
It's only specified up to 220Vac so I opened it to see if it would withstand UK mains which is specified as 230Vac nominal -6% +10% so can reach 253Vrms (x √2 = 357Vpk). The electronics seemed fine but the mechanics revealed it to be a lethal nightmare. The issues are not expensive to resolve and can only be put down to ignorance. Perhaps tellingly, it didn't even have the infamous 'Chinese Equipment' CE mark.
The first thing to note is the voltage dial, which has graduations from 0 to 22. Given the specified operating voltage of 220Vac, the average consumer would likely assume this to mean the output voltage will vary from 0 to 220Vac. Of course it doesn't, and the word thyristor in the description is the giveaway, although the part is actually a BTA41-600 triac. A thyristor performs the same function but only conducts in one direction whereas a triac conducts in both directions.
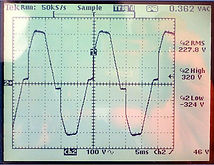
The circuitry is very simple. Triacs are used as switches for ac signals, and in this instance all that is happening is a portion of each full mains sinewave cycle is being switched out. You get less average voltage, but you still get the full on mains voltage. However its sinewave is heavily distorted with vertically chopped sections, which is why the ad warns: 'Do not use with air pump, electric/electromagnetic machinery or LED lamps as these will be damaged.'
LETHAL
Voltage dictates insulation distances for bare wires that must be maintained to meet safety regulations. There are multiple instances where this is not the case. There are no fuses (not even in the plug) and the mains inlet earth lead goes directly to the output socket, as a result the metal box is not earthed.
'This product is a metal case and must be grounded safely.' Clearly they expect me to add this feature!
Unlike UK mains sockets that have a spring-loaded cover, the output mains socket has bare contacts for live and neutral, although I saw these before I bought it, intending it for a permanent connection.
Internal connections are not insulated. Unsurprisingly the 'Overload protection switch' is just a single pole mains inlet switch; the mains lead isn't retained, and ventilation holes in the box are so large you could get a screwdriver into it which would instantly kill you when it touched the exposed mains.
In the original layout the centre terminal of the pot, at mains potential, was only 2mm from the case. The inside of the case is painted but this is no remedy. The case isn't even earthed! Utterly lethal.
Ordinarily I'd chuck it in the bin but having paid for it I decided to pick up the challenge to make it safe, or at least safer, see description and photos below:
IMPROVEMENTS
At least the triac is in an insulated package so the heatsink is too. A quick remedy was to rotate the heatsink and pcb 180° so there is now plenty of clearance between the pot leads and case. I also sprayed the back of the pcb with an insulating conformal coating for good measure.
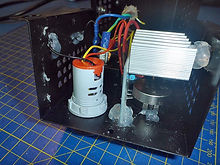
I replaced the uninsulated soldered connections with insulated crimps and secured them with RTV, which I also added between the heatsink and case. I drilled holes for earth leads to both case sections, first scraping the paint off both sides, and verified a low resistance connection throughout.
MORE TO BE DONE
The switch should be double pole but there isn't room and there should be fuses on both the input and output, and which I should fit, but haven't. For now I have simply chopped off the original unfused plug and replaced it with a fused one. I also added a Ty-rap to the mains lead just inside the box so it can't be pulled out like the original that relied solely on its rubber grommet.
The lethal output socket should be replaced with a UK safety socket but again there isn't room so I've added warning labels. The case holes are a major problem and a simple workaround to this is a plastic case around the entire box. In fact the best solution overall would be to mount it in a larger sealed box with the necessary switch, mains socket and separate input and output fuses on that instead.
I dread to think how many people who bought this on eBay are dicing with death every time they use it.
FIND REVERSE-ENGINEERED CCT FROM MY LOGBOOK
Left, original eBay photos; Right, there was only 2mm between the case and the pot centre connection.

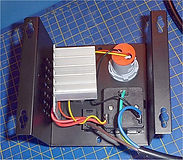

The controller is simply a triac with a pot to vary cycle width. Conformal coat added


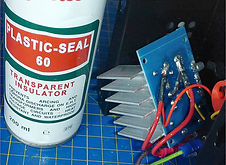
HS rotated 90° is safer Crimps & RTV added Fused plug instead Paint removed for earth

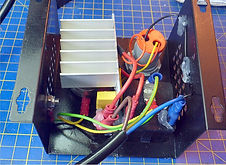
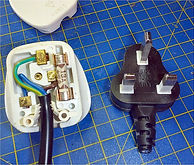

Earths added to all of case RTV secures pcb & HS Case holes covered Dial vs Vout



Tek P5102 HV probe Tek THS720A on Vout Output is steady over time

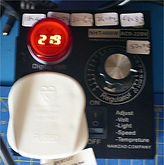
As can be seen below, it varies the average mains voltage by chopping out a portion of the leading edge of the positive and negative ac cycles whilst maintaining the rest of the peak to peak mains voltage on the output. Even long after the cycle peaks are eaten away, the overall pk-pk voltage is still dangerous. The leading edge is never less than ~90ns. I didn't see any spurious spikes. The LED voltage indicator is meaningless but like the dial it gives a non-linear relative value, see my graph above.
Tek THS720A 5ms, 500mV/div Tek THS720A 5ms, 100V/div


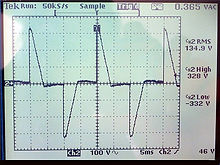
Tek THS720A 5ms, 100V/div Tek THS720A 5ms, 100V/div


4. Zenith Duratrak Model 100 8A Variac
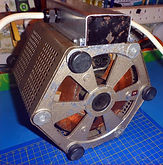
An eBay bargain for £42 late 2024 albeit with no rating plate, knob or dial, which has to be the reason why I was the only bidder as they now seem to go for astronomical prices. Another candidate for a Chinese DMM which ironically does away with the need for a dial, although I do have an idea for that.
Below, how it arrived: no knob, no protective cover at the top and exposed mains connections:

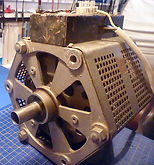


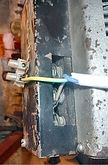
Claude Lyons history (see Foreword at top) suggests this is a 1930s to 1960s Type 100.
Variants are suffixed -K, -L, -Q, -R, of which the -L & -K are 0-230V out and -R, -Q are 0-270V out.
Photos to the right show a bare 100-L (0-230Vout) and a cased 100-R (0-270Vout), the opposite of which is implied by the historical photo table.
I don't know what the K and Q variants are.
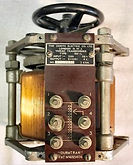

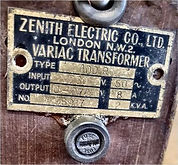
Having tested mine, I've found it's a 0-230Vout model so it's either a type -L or -K.
HARDWARE
All fasteners have imperial screw threads. The top is secured to the bottom by three equispaced threads each with a large nut at the top. Between the bolts are three empty 1/2" deep bolt holes similarly threaded at the top.
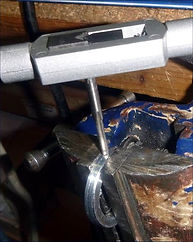
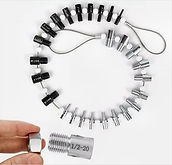
Lacking any imperial bolts, I bought a thread checker (right) to identify them.
The checker has 3/8" UNC (18 tpi) and 3/8" UNF (24 tpi) and it is 3/8" but neither of these; the number of threads matches the 7/16" 20 tpi. I confirmed they are 3/8" 20 tpi BSF, which makes sense as this variac could be from the era when BSF preceded UNF: https://en.wikipedia.org/wiki/British_Standard_Fine
The small screws that secure the hexagonal metal case around the variac are large button head slotted screws 1/4" long with 40 tpi and a major diameter of 0.138". This site says 0.138" is 6G-40 UNF:
https://www.classicfasteners.com.au/content/threadch.pdf
aka #6-40 UNF x 1/4": https://www.machiningdoctor.com/threadinfo/?tid=13
The three empty 1/4" deep threads for the dial on the top of the assembly are also #6-40 UNF x 1/4".
The electrical terminal has a major diameter of 0.2315". It's close to M6 so could be 1/4". Its tpi is less than 28 but closer to 28 than 20 so it may be a 1/4" 26 tpi BSF.
The Paxolin insulating base for the terminals and its metal shroud are retained by #10-32 UNF x 1/4".
The two screw holes in the Paxolin base ONLY, located above the terminals, are #10-32 UNF x 1/4".
The Paxolin insulator is 1/4" thick.
This site compares UNC, UNF, BSW, BSF threads: https://arunfasteners.co.uk/blog/unc-unf-or-unef/
This site explains how to identify imperial screws by their dimensions:
[U10] https://www.accu.co.uk/p/454-imperial-thread-chart-for-imperial-bolt-sizes
KNOB
A bearing secured to the shaft by two external screws is attached to the bottom of the top spindle. I assume this was added by the seller for use as a handle. It does work, but all ancient variacs have Bakelite knobs that insulate the user from the spindle and although I imagine it is unlikely the spindle would go live, I would like to reduce the odds. The bearing also seems a bit Heath-Robinson:
https://en.wikipedia.org/wiki/W._Heath_Robinson
Knob prices are ridiculous. My solution was to modify and fit the weird wooden spacer I found in the Berco Regavolt, see 2a above. The spindle on that is 1/2" but this one is 3/4" because the original handle was a huge spoked wheel you would normally expect in an industrial waterworks, see photos above.
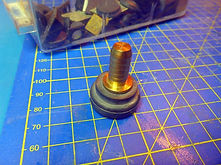
It was at this point that I finally solved the mystery of why the variac it came in stopped working three-quarters around its dial: the wooden spacer's central hole was not drilled straight! Impossible to correct now, it worked well enough as a knob.
The first step was to increase the spacer central hole, and the only practical way to do that was to glue a 1/2" diameter wooden rod into the hole then drill it out to 3/4" (19mm) using a rotary hole saw.
The next step was to add two screws to secure the wooden handle to the shaft. I found the wooden spacer to be a hard material, but I didn't want the screws to eventually strip their threads, so I drilled out the existing 6mm holes in its top to 8mm and inserted cut to size 8mm diameter aluminium tubes (I didn't have any rod, let alone a denser metal). I then drilled a hole mid point each side through the wood and tube and into the 3/4" shaft hole. I tapped the holes to M5 and added M5 screws to secure the knob to the shaft, cutting the screws to the required length. The aluminium tubes now retain the screws.


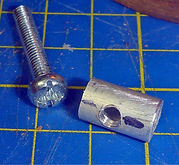
I inverted the knob to hide the holes and filled the small guide holes on the new top side with wood filler which I then dyed closer to the wood. Finally I cut flat screwdriver valleys into the screw cross heads (all I had). I recessed the screw heads in the wooden knob sides, then hid them behind plastic screw covers to insulate any operator from the spindle, which I also hid below a top plastic cover.
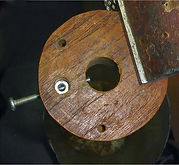
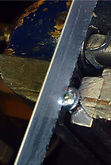


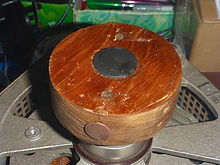
I may add a 2" ID PVC tube between the aluminium disc and the bottom of the knob to fully hide the shaft and bearing. For now I added a 3/4" ID PVC tube around the shaft between the bearing and the knob.
VARIAC TOP COVER
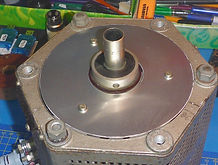
I found eBay China willing to offer me a custom laser-cut aluminium disc (OD 147mm, ID 50mm) to cover the top of the variac for £7 including postage, which is cheaper than I'd get in the UK.
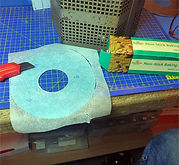
To drill the disc for the three #6-40 UNF screws, I temporarily stuck a piece of tracing paper over the disc with a Pritt stick, cut it to the same size with a sharp craft knife, removed it from the disc, placed it on the top of the variac and drew the outlines of the three holes on it (#6-40 UNF is around 3.5mm diameter). I stuck it back on the disc and drilled the holes to 4mm. Finally I fitted the disc to the top of the variac and screwed it in place with some #6-40 UNF x 1/4" screws from my parts box. This cover stops anything falling into the variac as well as protects me from the high voltages within.


DIAL
I'm thinking of fitting a clock dial instead of the normal one as the only place I could find selling variac dials has ludicrous prices (in the USA, Variacs are also called Powerstats):
https://www.surplussales.com/variacs/Variacs-1.html
WIRING AS IT ARRIVED
The variac arrived with untethered mains leads emerging from wide holes in each side of the steel cover over its mains terminals at the front, with their earths connected externally in a small loose wiring block and then up to a bare wire leading to a #10-32 UNF x 1-1/2" screw retaining the front cover.
Even worse, the Live wire in was connected to the Neutral wire out. The seller said they had been using it to power a 2kW water tank and 'the buyer should be someone familiar with electrics'! At least all the screws were tight.


ALUMINIUM SAFETY COVER
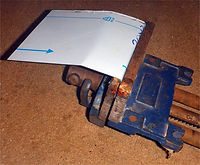
Below, I wrapped a sheet of 1mm aluminium over the steel cover to hide its lethal gaping holes, at the same time hiding the unsightly rusty gaps in its tatty black paint.




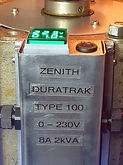
LED DMM
Below, the steel cover is 65mm wide x 35mm deep. The LED DMM body diameter is 21.5mm, and I used a variable length sheet metal drill to make a 22mm hole for it in the top end of the steel cover.


FUSE
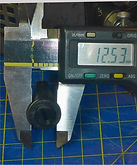
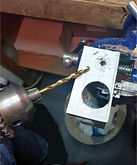
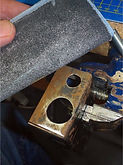
Below, the fuse body diameter is 12.5mm. I used conventional drills to make the hole. As steel is hard to drill, I used multiple bits starting at 4mm, working up to 13mm. I sanded down the paint and rust so it largely matches the aluminium disc and whilst I was at it, I also sanded down the top nuts.


SECURING THE COVER
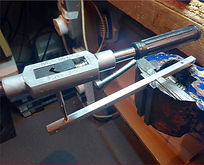
There wasn't enough room to accomodate side bends in my safety cover to secure it using the existing case screws, so instead I added two vertical 6mm square aluminium bars each side. I drilled the top and bottom to locate the bars in the case holes, replacing the #6-40 x 1/4" screws with #6-40 x 1/2". I drilled and tapped holes for two M3 x 14mm screws through each bar and through both the aluminium and steel covers as well as the Paxolin, with a 10mm gap to the variac screw terminals and I confirmed the covers were earthed.




GLANDS & SOCKET
I drilled 16mm holes for PG09 8mm cable glands to secure the mains leads. There is just enough room below the gland wires for the DMM current measurement toroid.
EARTH POINT
The Paxolin was secured to the assembly by two diagonally opposed #10-32 UNF x 1/4" domed slotted screws but there is a 7/8" deep closed thread in each corner. The screw domes restrict internal space and a screw in each corner is much more secure than two. I found four #10-32 UNF x 3/4" pan head slotted screws and fitted these instead, together with lock washers, creating more space between the Paxolin and fuse to secure the earth in the same top right hole beneath it.
REWIRED
Below centre, I terminated all bare mains wires in ring crimps, added lock washers and corrected the wiring. I surmise the reason why the L & N were swapped is because when I initally wired it up conventionally with L into pin 1 at the top and N into pin 3 at the base, the dial operated in reverse.
A variac doesn't care which way round the L and N go, but a load does. To solve this riddle all I had to do was swap the incoming L onto pin 3 and N onto pin 1 and unlike the previous owner, make sure the L and N outputs went to their respective L and N socket connections.
Below left, there wasn't room to fit the retaining nut on the DMM so I glued it into the steel case with epoxy resin. It was also difficult to tighten the nut on the fuse so I glued that too. Ordinarily I would never use glue instead of a nut as it makes replacement difficult but this variac will see limited use and based on the DMMs in the Berco Regavolt 72C main lab variac which has been on 24/7 for several years, hopefully this DMM will be just as reliable. The fuseholder was new, so should not be an issue. All exposed metalwork on the fuse and DMM is insulated by (yellow, black) heatshrink.
Below right, I replaced the cheap unswitched mains socket on the end of the output cable with a double pole switched household mains socket mounted on a plastic pattress box.


FEET & VENTILATION
I secured three 1" diameter rubber feet whose round brass inserts had once been in a wooden cabinet, into the unthreaded holes in the base. This now lifts the variac off the ground, providing an air gap for rising heat to promote cooling air flow entry from the underside and out through the case ventilation holes, particularly now my top cover disc has removed the air escape path at the top.
Lastly I added labels to the cover. These would be better on a white PVC label but I don't yet have it.

text
text
µ Ω ± ° ⌠ ⌡ ∫ │ ─ √ φ θ Θ ∂ δ ζ ξ ς λ ψ ω τ µ Ω ∆ Δ ∑ ∏ π Ξ ○ ≠ ³ ² ±